Getting started
Theme installation
Requirements
- PHP 5.2.7+
- PHP Multibyte String support
- PHP JSON support
- PHP DOM XML support
Upload via ftp:
- Unzip the theme archive file to any folder on your hard drive.
- Upload the theme folder to the server (to the /wp-content/themes/ directory).
Upload via Wordpress admin:
- Login to your Wordpress admin panel (add /wp-admin after your domain name in the browser address bar)
- Now go to Appearance
- Select the Add New Themes option
- Click Add new
- And upload your theme archive file
Installing WordPress http://codex.wordpress.org/Installing_WordPress
Theme activation
Once you have uploaded the theme, activate your theme in Appearance
> Themes.
Using Themes http://codex.wordpress.org/Using_Themes
Second method to install demo data - SQL dump file installation
To make your WordPress look like our live demo please, follow the instructions bellow.
- Install the template by following the directions
- Then, copy and unzip files from the folder "plugins" to the /wp-content/plugins/ folder or use the admin panel Dashboard > Plugins > Add new > Upload and select your plugin.
- Copy "uploads" folder to /wp-content folder.
- Import the dump file (***.sql) via phpMyAdmin or some other database management tool.
Important: before importing dump, please replace all your_website_url_here occurrences inside sql file with necessary domain url (no slash in the end).
Eg.: your_website_url_here -> http://mysite.org/new
Permalinks settings
In this template the Permalinks are used, the standard paths of http://demolink.org/?p=1 are replaced with http://demolink.org/home. This way of links configuration can be used by not only our blog followers but will help in SEO-optimisation as well. The effectiveness and main features of this link configuration method are revealed here - http://codex.wordpress.org/Using_Permalinks
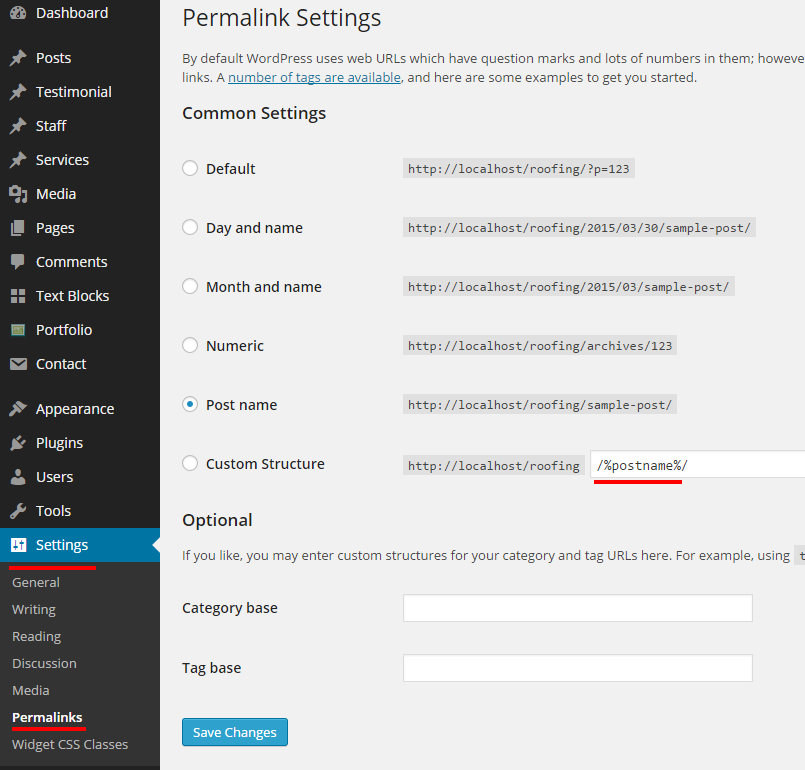
- Log in to your WordPress Administration Panel (Dashboard).
- Click the Settings
- That done, click Permalinks
- In permalinks settings please select Custom structure, after that copy and past the following settings /%postname%/
- With that done, click the Save changes button.
If you install the theme with the dump.sql file the settings will be configured automatically. However even in this case you still need to save the current settings by clicking Save changes.
Menu setup
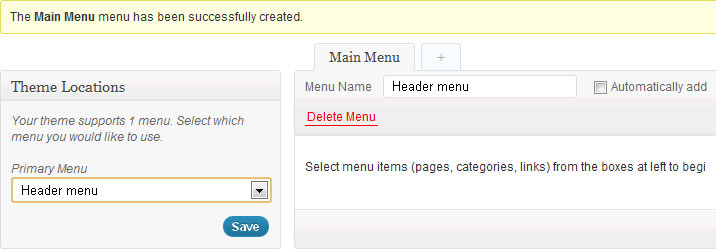
WordPress comes with a menu management panel, which makes building your sites navigation very easy and flexible.
This theme is registered with one menu location:
- Header Menu - in Header
Page Templates and Sidebars
Page Templates
- Blog
The page template for blog(main column and right sidebar). Outputs posts (with pagination) in the main column. Right sidebar contains useful widgets. - Fullwidth
Single column layout with maximum width of 1170px. - Portfolio
Displays image galleries from the portfolio content type. Has built-in js filtering and popup. - Right Sidebar
Outputs page with Secondary Sidebar widget on the right.
Widget positions
- Sidebar - blog pages
- Sidebar Secondary - on right sidebar page template.
- Footer blocks - on all pages
Posts and Categories
Adding category
Review the following link for more info on adding categories: http://codex.wordpress.org/Manage_Categories_SubPanel
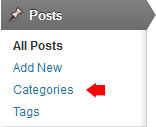
- Log in to your WordPress Administration Panel (Dashboard).
- Click the Post tab
- That done, click Categories for blog posts
- Type in the name of your new category
- With that done, click the Add New Category button
Creating a blog post
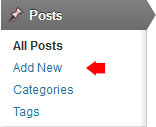
- Log in to your WordPress Administration Panel (Dashboard).
- Click the Posts tab
- And click the Add New tab
- Type in your post content. For more info on adding posts, please review the following link http://codex.wordpress.org/Posts_Add_New_SubPanel
- And finally click the Publish button
Adding a Portfolio post
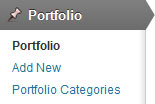
Portfolio items are essentially custom post types http://codex.wordpress.org/Post_Types#Custom_Types. which means that they are different from common posts, such as blog posts, Portfolio posts etc. That allows us to manage the content of the site really easy.
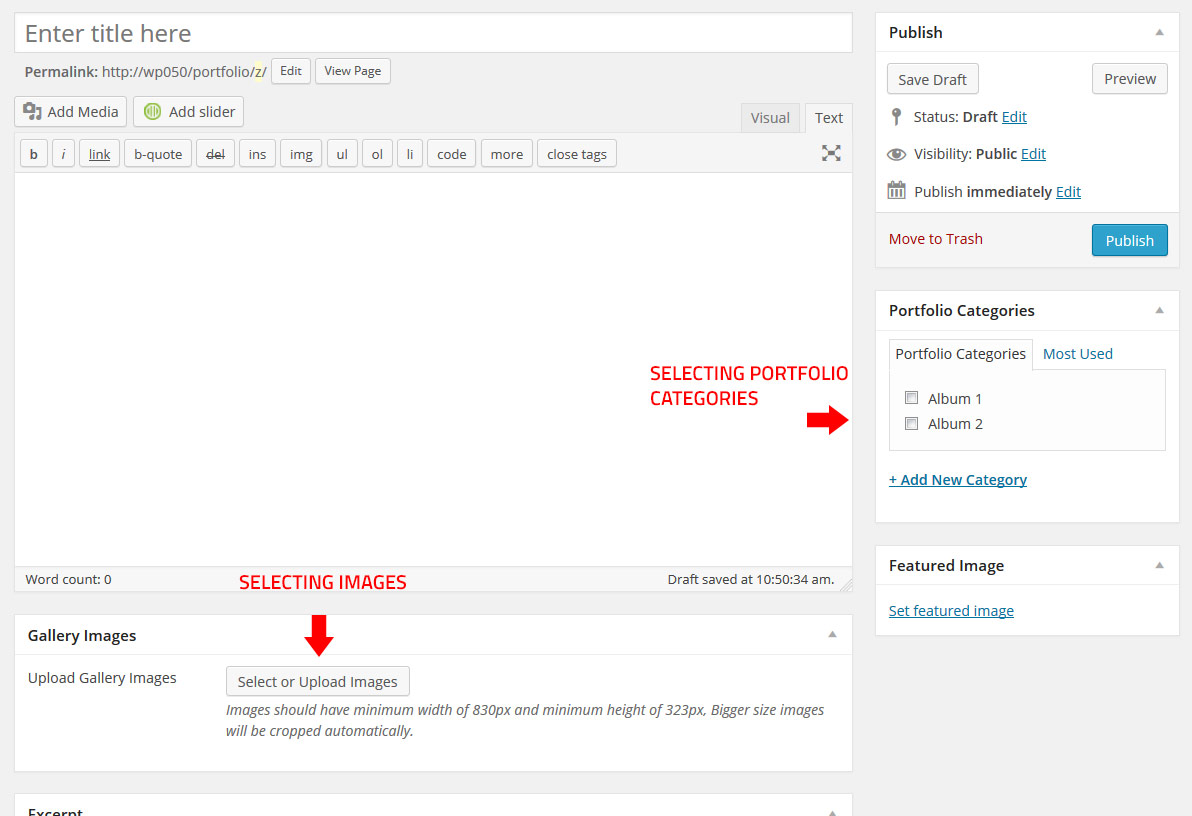
- Log in to your WordPress Administration Panel (Dashboard).
- Click the Portfolio tab
- And now the Add New one
- Fill in all the required fields (title, content)
- Upload your image with the Gallery Image metabox
- The following options are available for a porfolio post:
- lightbox-url - path to the large image. Once clicked it'll pop up with the help of prettyPhoto
- And push the Publish button
Shortcodes
Shortcode is a powerful content building tool http://codex.wordpress.org/Shortcode.
Shortcodes are easy to use.
- Wrappers, columns & functional elements.
Based on the Bootstrap v3 framework. -
- Container - wraps content with container class
Arguments: class (additional css class of the element)
Usage: [container] container content [/container]
HTML Output:<div class="container">container content</div> - Row - wraps content with row class
Arguments: class (additional css class of the element)
Usage: [row] row content [/row]
HTML Output:<div class="row">row content</div> - Columns - add bootstrap classes to make grid layout
Arguments: class* (css class of the element, multiple implementation is allowed)
Usage: [column class="col-sm-6 col-md-4"] column content [/column]
HTML Output:<div class="col-sm-6 col-md-4">column content</div> - Semantic columns - columns with logical names, though based on the
same bootstrap css grid
system
Arguments: class (css class of the element, multiple implementation is allowed)
Variants: [one_half] 50% width column [/one_half] [one_fourth class="col-mid"] 25% width column [/one_fourth] [one_fourth] 25% width column [/one_fourth]
Allowed items:[one_half], [one_third], [two_third], [one_fourth], [three_fourth], [one_sixth], [five_sixth]
HTML Output:<div class="col-sm-6">50% width column</div> <div class="col-sm-3">25% width column</div> <div class="col-sm-3">25% width column</div> - List - wraps unordered list with div and configurable class for easier styling
Arguments: class (css class of the element, multiple implementation is allowed)
Variants: [list class='bullets'] unordered list items here [/list]
HTML Output:<div class="list bullets"> <ul> <li>list item 01</li> <li>list item 02</li> <li>list item 03</li> <li>......</li> </ul> </div> - Wrapper - wraps content with div and configurable class for easier styling
Arguments: class (css class of the element, multiple implementation is allowed)
Variants: [wrapper class='wrap-info'] ... any content ... [/wrapper]
HTML Output:<div class="wrapper wrap-info"> ... any content ... </div> - Block - wraps content with div and configurable class for easier styling
Arguments: class (css class of the element, multiple implementation is allowed)
Variants: [block class='block-news-all'] ... any content ... [/block]
HTML Output:<div class="block block-news-all"> ... any content ... </div> - Clear1 - functional element to prevent content from floating
Arguments: none
Usage: [clear]
HTML Output:<div class="clear"></div> - Spacer1 - functional element to add extra spacing between parapgraphs
Arguments: none
Usage: ... content... [spacer] ... content...
HTML Output:content <div class="spacer"></div> content -
1 - no closing is needed
* = required
- Container - wraps content with container class
- Content output
-
- Recent Posts - display specific content based on the configurable parameters
Arguments:- type => post type (values: post or any other custom post type; Eg.: testimonials, portfolio)
- category => post type category (category slug)
- custom_category => taxonomy (taxonomy slug)
- num => number of the items to show (values: -1 = all, 1,2,3 etc.)
- meta => whether to show post information (value: true, false)
- thumb => whether to show featured image (value: true, false)
- thumb_width => featured image width in pixels
- thumb_height => featured image width in pixels
- more_text_single => read more button text
- excerpt_count => number of displayed symbols
- class => css class of the whole block
- class_item => css class of the single post item
Usage: [recent_posts type="services" num="4" meta="true" thumb="true" thumb_width="270" thumb_height="180" excerpt_count="20" more_text_single="read more" class="services-carousel col-sm-12" class_item='post-item'] - Recent comments - show post comments
Arguments:- num => number of the items to show (values: -1 = all, 1,2,3 etc.)
Usage: [recent_comments num="2"] - Popular Posts - show most viewed posts
Arguments:- num => number of the items to show (values: -1 = all, 1,2,3 etc.)
Usage: [popular_posts num="2"] -
Tags - show post tags
Arguments: none
Usage: [tags] - If you do not specify some of the arguments - default values will be applied.
- Recent Posts - display specific content based on the configurable parameters
Plugins and custom widgets
Plugins
The widgests used in the theme are listed below
Contact Form 7
Download: http://wordpress.org/extend/plugins/contact-form-7/
Description: Contact form.
Breadcrumb NavXT
Download: https://wordpress.org/plugins/breadcrumb-navxt/
Description: Page navigation.
Meta Slider
Download: http://www.metaslider.com
Description: Easy to use slideshow plugin. Create SEO optimised
responsive slideshows with Nivo Slider, Flex Slider, Coin Slider and
Responsive Slides.
FAQs
How to create Contact Form in WordPress
This video tutorial will show you how to add contact form in WordPress using the Contact Form 7 plugin
Installing Contact Form 7 plugin
- Open WordPress admin panel
Go to Plugins and click Add New
If you want to search for the plugin and download from the Internet type Contact Form 7 in the search field.
In case the plugin is included into the template package you ordered click Upload link and Browse for the plugin file in the template sources/plugins folder.- When the plugin is installed click Activate.
Creating Contact Form
If the plugin has been installed correctly you should see the Contact tab in the left column. Click it
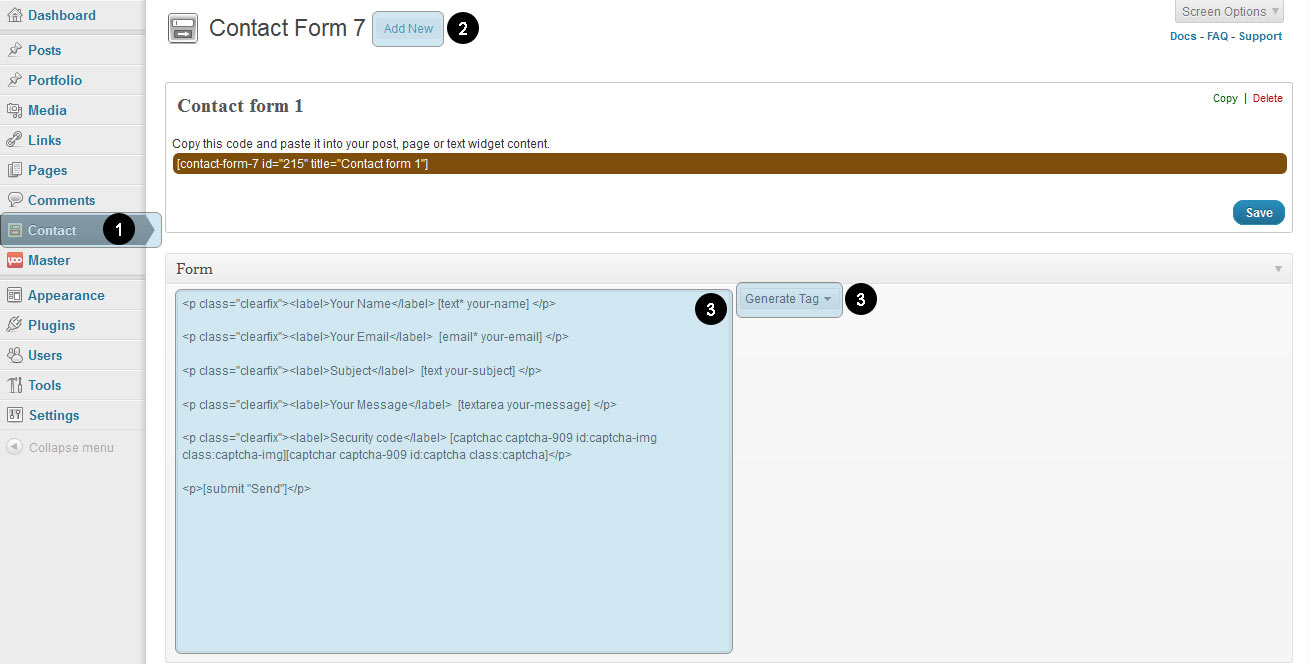
- To add New Contact Form click Add new button link under the Contact tab.
- You can also click Add New at the top of the screen.
- In this field input the HTML for tags like
<form>,<input>etc - You can also use the tags drop down to add the fields you want.
How to install WordPress plugin (through admin panel)
- Open WordPress admin panel and go to Plugins tab
- Click Add New button at the top.
- From the top menu select Upload.
- Click Browse and select the plugin package. Usually the plugins provided with the WordPress theme could be found in the sources/plugins folder. When you found the plugin package click Open, then Upload.
- When the upload procedure is done you need to activate the plugin. Use the Activate Plugin link.